




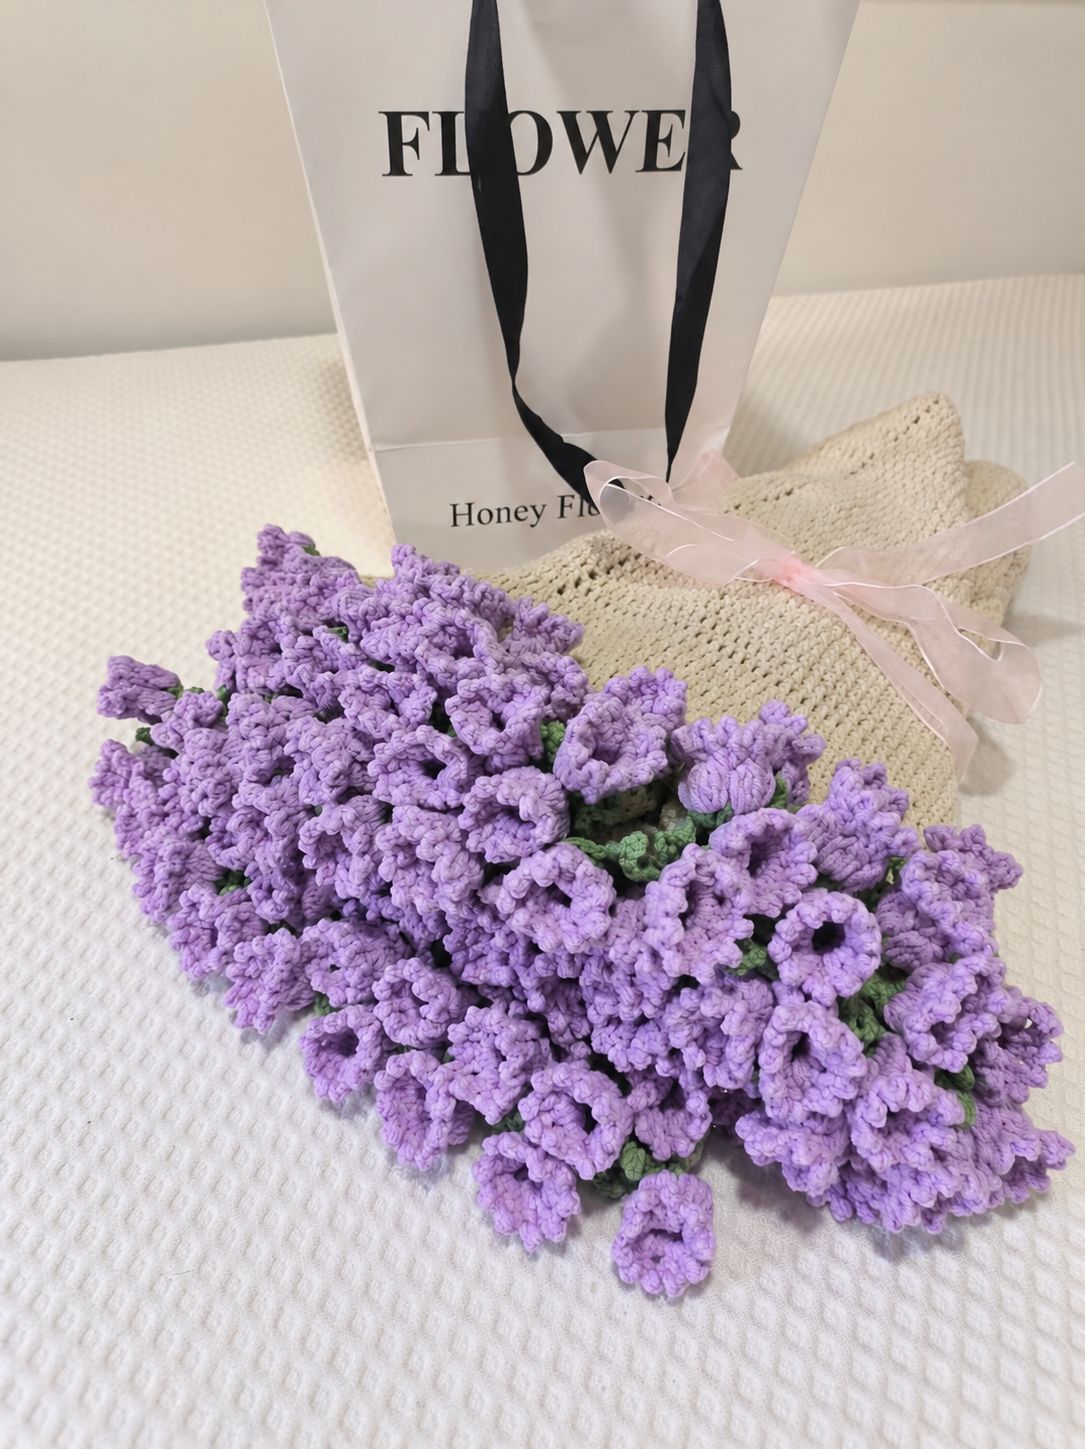
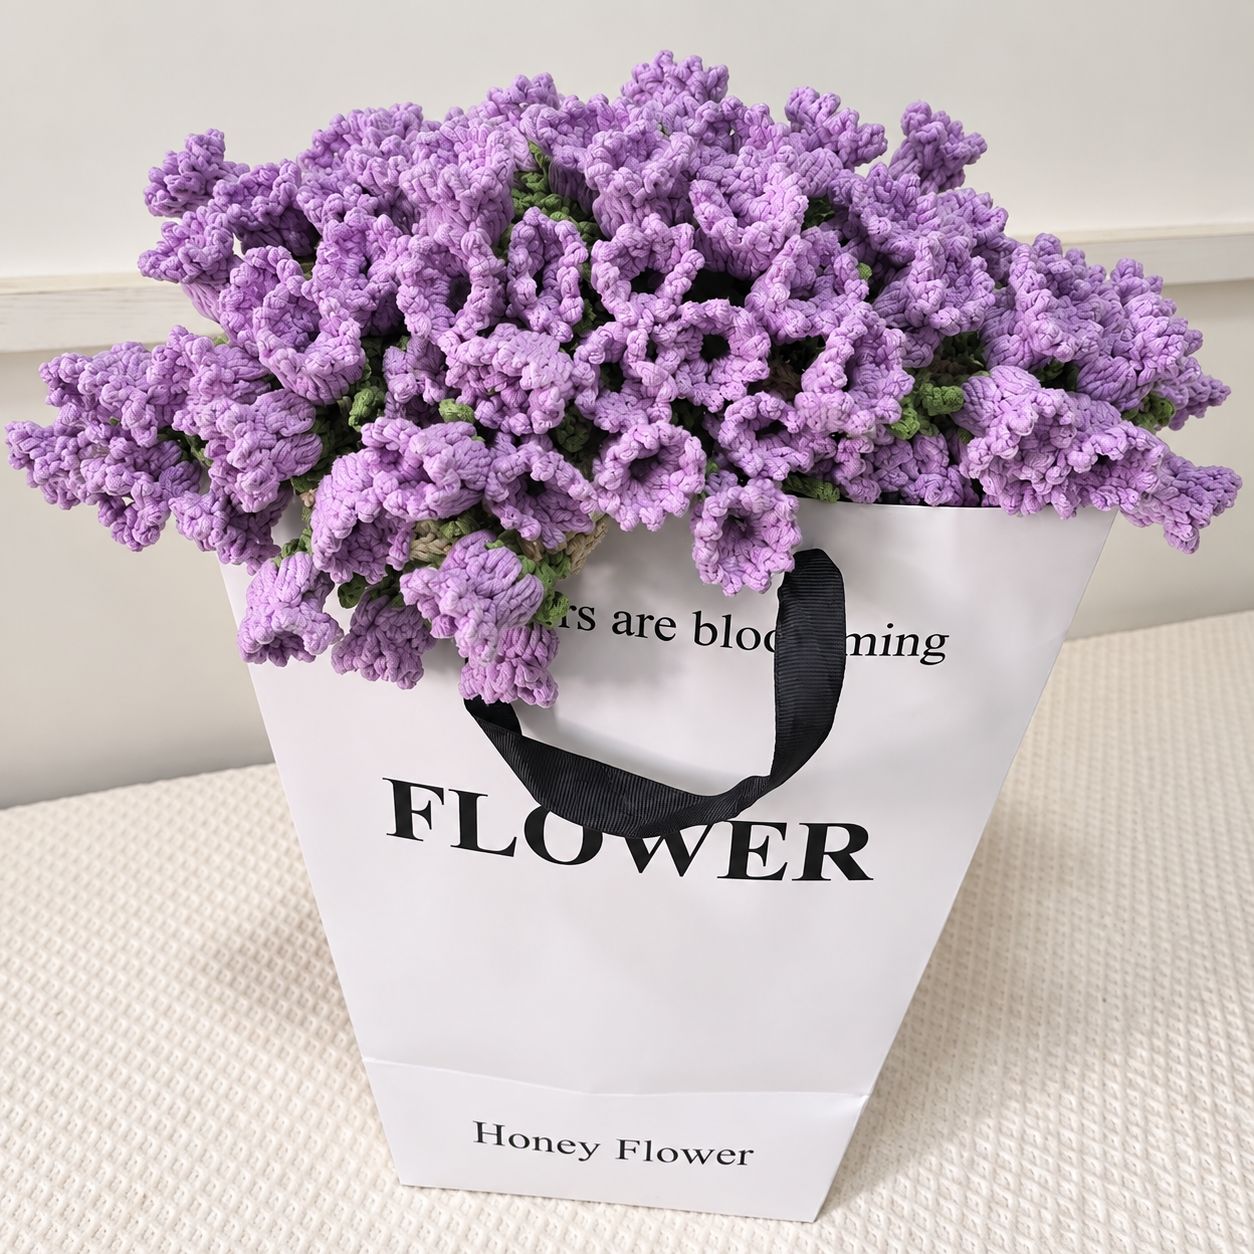
Everything about this pattern, before you pay for it
Most pattern listings tell you after. Here is the whole spec.
| What it is | A written crochet pattern, delivered as a PDF. The file itself is titled Lily of the Valley Blanket. |
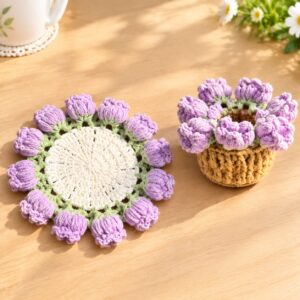
| What you make | A round blanket with a green edging of flat scallops and pointed leaves, and a small lily of the valley on every scallop. Spread it out as a blanket, or gather it up from the centre into a bouquet. |
| Two bodies, one pattern | Openwork: twelve spokes of little holes from the centre to the edge — flatter and softer. Ridged: twelve raised lines of front post double crochet instead — a little firmer, and a little more work. Round 1, the sizes, the edging and the lilies are the same for both. |
| Sizes | Three, as the pattern gives them — see the table below. The pattern also tells you to measure: tension varies, so stop at your size’s round and add a round or two if the body is short. |
| Hook | 3.0 mm — the only hook in the pattern. |
| Yarn | 5-ply combed milk cotton, about a US DK weight, in three colours: a main colour for the body, green for the leaves, and a colour for the lilies. How much of each is in the table below. |
| Skill level | Confident beginner, which is what the pattern itself says: joined rounds, double crochet increases, working into chain spaces, clusters and picots. The ridged body adds front post double crochet. |
| Techniques used | Magic ring · joined rounds, closing each one where it began · chain, slip stitch, single crochet and double crochet · the double crochet increase · skipping a chain space so it stays open as a hole (openwork body) · the front post double crochet, worked around the post of the stitch below (ridged body) · working into a chain space · a pointed leaf made of chains and a slip stitch · the 5-dc cluster · the chain-3 picot · joining a new ball in the middle of a round · changing colour for each new part · weaving in and knotting ends |
| Worked in | Joined rounds, from the centre out. Each round starts with ch 3, which never counts as a stitch: the round’s first double crochet is its first stitch. |
| Every round written out | Rounds 1 to 3 line by line, each followed by a count checkpoint. From round 4, each body is a table with one row per round up to round 46, and the stitch count on every row. You never have to work a round out yourself. |
| The shape | Each round’s increase sits on top of the one below. That is what lines the holes, or the ridges, up into twelve straight spokes — and it gives the blanket twelve slight corners rather than a perfect circle. It is meant to look that way. |
| The edging | Worked straight onto the body’s last round. Round 1 is a ring of chain-5 loops, one for every 3 stitches. Round 2 turns the loops, one after the other, into a flat scallop and then a pointed leaf, all the way round. The pattern gives the exact loop count for each size and body, from 132 to 188. |
| The lilies | Worked straight onto each flat scallop: five 5-dc clusters in the scallop’s five spaces, then double crochets and chain-3 picots between them. The leaf points carry no lily. |
| Count checkpoints | Nine: 12 dc at the end of round 1; 24 dc in 12 pairs, then 12 groups of 3, on the openwork body’s rounds 2 and 3; the right number of dc in each of the 12 groups at the end of the body; 24 stitches, then 12 short ridges starting, on the ridged body’s rounds 2 and 3; one loop for every 3 stitches at the end of edging round 1; scallops and leaves alternating in equal numbers at the end of round 2; 5 clusters on each lily. |
| Sewing | None. The leaves are worked onto the body and every lily onto the leaves. The only needle work is weaving in ends. |
| Also needed | Two stitch markers, a blunt yarn needle and scissors. |
| Pages | 28 |
| Terminology | US crochet terms |
| Language | English |
| Left-handed | Written for you too. Work it exactly as written and your blanket comes out a mirror image of the photos. Nothing else changes: the body is twelve identical wedges, and the edging repeats the same pair all the way round. |
| Delivery | Download link on the confirmation page and in your email, straight away. |
The three sizes. The body rows and the main-colour yarn are the pattern’s own figures. The rest are worked out from the stitch counts, which is why they say “about”.
| Small | Medium | Large | |
|---|---|---|---|
| Body across | 70 cm (about 27½ in) | 90 cm (about 35½ in) | 100 cm (about 39½ in) |
| With the edging | about 80 cm (31½ in) | about 100 cm (39½ in) | about 110 cm (43¼ in) |
| Body rounds | 33 | 42 | 46 |
| Main colour | 350 g (7 × 50 g) | 600 g (12 × 50 g) | 700 g (14 × 50 g) |
| Leaf green | about 60 g (2 × 50 g) | about 75 g (2 × 50 g) | about 80 g (2 × 50 g) |
| Lily colour | about 175 g (4 × 50 g) | about 220 g (5 × 50 g) | about 240 g (5 × 50 g) |
| All together | about 590 g (1,300 yd) | about 900 g (1,950 yd) | about 1,020 g (2,250 yd) |
| Lilies — openwork body | 68 | 86 | 94 |
| Lilies — ridged body | 66 | 84 | 92 |
| Time to make | about 30 hours | about 40 hours | about 50 hours |
Real crochet, captured while it was being made
You have learned to zoom in on a listing photo looking for stitches that don’t join up. You should — the shops selling patterns behind pictures that were never crocheted are real, and there are a lot of them.
So here is the unglamorous version: the edging going onto a pale green body, flat scallops and pointed leaves, with a thumb holding it open; a pale blue lily’s first clusters going into an orange scallop, on a hook with a red handle; and a finished lily with its picots round the rim, held between two thumbs. Every one of these was captured while the piece was actually being made.
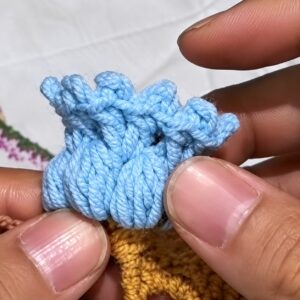
The colours in them are not the colours in the finished photos above — the edging here is orange, where the pattern’s is green — but the stitches are the same.
The lilies are the ones to look at. Each one is five clusters worked straight into the spaces of a scallop and finished with picots, so there is no flower to make separately and sew on.
Nothing on this page is an AI-generated blanket.
Counted twice
My grandmother taught me on her porch, and she said the same thing every time I tangled the yarn: slow down, count twice, rip it out if it’s wrong — there’s no shame in starting over.
So every pattern in this shop gets counted twice. Once when it’s written. Then again, before it goes on sale: every round is re-added, stitch by stitch, and checked against the round before it.
That’s the whole thing. It’s not clever. It is just the step almost nobody takes, because until a pattern is written down properly you can’t take it — and because nobody was ever asked to show their working.
I’m asking to show mine.
The worst thing a pattern does is not be difficult. It is to be wrong early, so that you find out rounds later and spend the next twenty minutes wondering whether it was you. On a blanket, the rounds later can be thirty of them.
The likeliest place for that on this one is the edging. Its first round has to come out even — one loop for every 3 stitches of your last round — and by then you have worked 33, 42 or 46 rounds. So the pattern doesn’t leave you to divide. It gives you the loop count for your size and your body, and the number of lilies that follows from it.
Counted twice means you can tell. No more counting the same round for the third time, writing it out on paper to make it add up, and still not knowing whether it’s you or the pattern. The count in the pattern is right. If yours doesn’t match it, the slip is in the round you just made — undo that one round and carry on.
You probably have one project in a bag somewhere, stopped at a round you can still name. Often it stopped on a count that wouldn’t come out. Every count in this one comes out, which leaves you the part you came for: finishing it, and gathering it into a bouquet for someone.
Here is a real page of it
A pattern that was never crocheted can show you a photograph. It cannot show you a page. 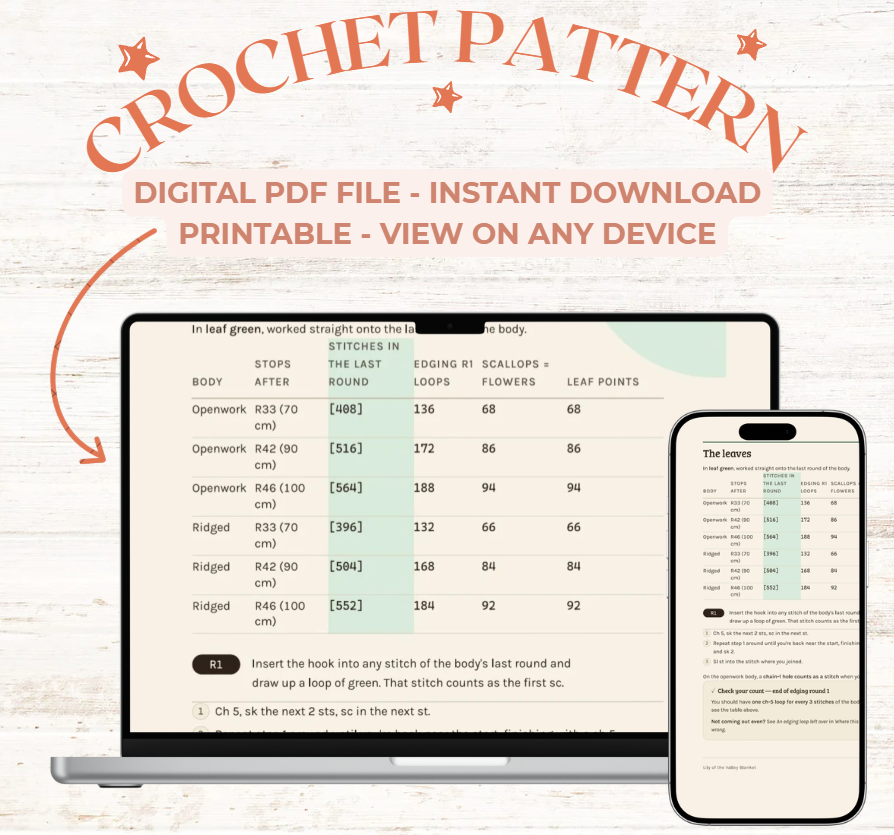
That table is the edging worked out for you: for each size and each body, the stitches in your last round, the loops they make, and the lilies and leaves that follow. Under it, after the round’s three steps, is the checkpoint at the end of the edging’s first round. This is page 23 of the 28 you get, and it is the same page you will be reading with a hook in your hand.

Reviews
There are no reviews yet.